
Protect your asphalt this winter by inspecting for cracks, cleaning surfaces to expose hidden damage, and sealing or filling cracks before freezes hit. Repair potholes early, improve drainage so meltwater runs off, and use plastic shovels or raised plow blades to avoid gouging. Focus extra care on high-traffic areas, monitor mid-winter for new failures, and plan post-winter repairs and budgets now. You’ll pick up specific steps and products that make these strategies work even better.
Key Takeaways
- Inspect asphalt regularly for new cracks, potholes, pooling water, and ice sheets, documenting locations and severity for timely winter and post-winter repairs.
- Clean surfaces of debris, dirt, and oil to reveal hidden damage, then photograph and log issues for planned maintenance.
- Use plastic shovels, rubber-edged tools, and raised plow blades to prevent gouging or scraping asphalt during snow removal.
- Choose asphalt-safe, eco-friendly de-icers like calcium magnesium acetate, applying only at recommended temperatures and rates to reduce surface and environmental damage.
- Fill cracks and potholes promptly with proper materials, then schedule sealcoating in warmer seasons to limit freeze-thaw penetration and extend pavement life.
Inspect Asphalt for Cracks Before Winter
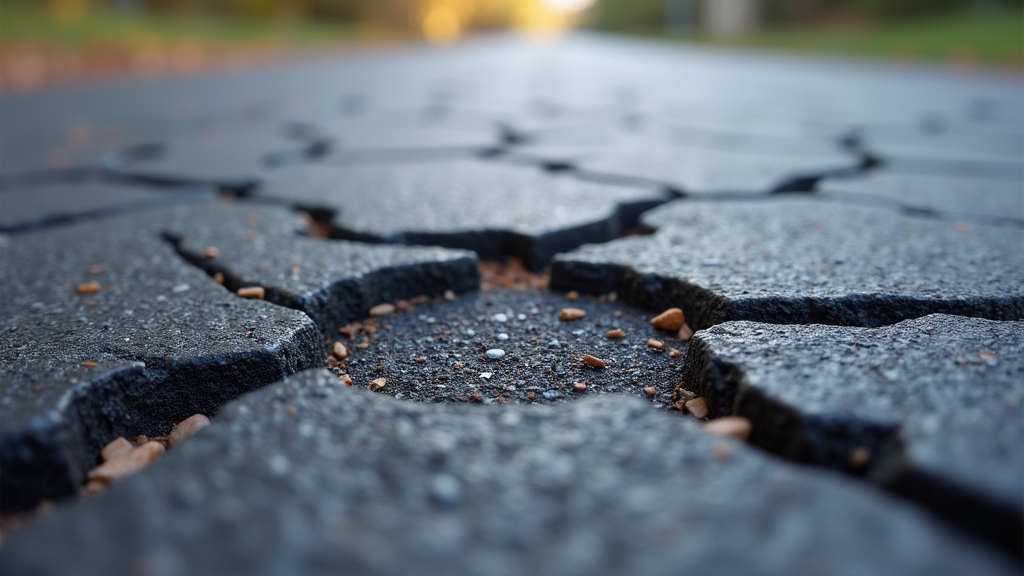
Before freezing temperatures arrive, inspect your asphalt for cracks so you can fix small problems before they expand into costly damage. Start with a slow walk around your driveway or lot, looking closely at high-traffic areas, edges, and spots where water usually pools.
Before winter, walk your asphalt slowly, checking high-traffic zones, edges, and water-prone low spots for cracks
Use consistent crack measurement: note any opening wider than a quarter inch or deeper than a half inch, because these allow water to penetrate and freeze. Record what you see in a simple log with dates, locations, and sizes.
Set an inspection frequency that matches your climate and traffic. In harsh northern climates, check monthly in fall; in milder regions, at least once before winter.
Pay attention to new cracks, but also see whether existing ones are lengthening or widening. When you notice rapid changes, schedule repairs sooner, since expanding cracks usually signal a weakening base or worsening drainage conditions beneath the asphalt each year.
Clean Asphalt Surfaces to Reveal Hidden Damage
Even a light layer of dirt, leaves, or oil can hide developing cracks and potholes, so give your asphalt a thorough cleaning to see its true condition.
Start with a stiff broom or power sweeper to remove loose debris, then follow with a pressure washer on a moderate setting. This surface cleaning exposes hidden damage that daily traffic and weather may have concealed.
Pay attention to areas where water tends to pool or where snow piles up; these spots often show the first signs of trouble once they’re clean.
Use a degreaser on oil and chemical stains so they don’t soften the pavement. Rinse thoroughly and let the surface dry before inspecting.
After cleaning, walk the entire area slowly. Look for hairline fractures, raveling aggregate, sunken spots, and crumbling edges. Document what you find with photos and notes so you can plan timely, targeted maintenance before winter weather.
Sealcoat and Fill Asphalt Cracks Ahead of Freezes
Once you’ve exposed every flaw with a thorough cleaning, it’s time to lock out water by filling cracks and applying a fresh sealcoat before temperatures drop.
Focus first on crack filling. Remove any loose edges with a wire brush, then blow out dust so repair materials bond well. Use a rubberized crack filler that remains flexible in cold weather, and slightly overfill each crack so you can smooth it level with a squeegee.
Focus on crack filling first: clean edges, blow out debris, then overfill with flexible rubberized filler.
After cracks cure, move to asphalt sealcoating. Check the forecast; you need several dry days with pavement and air temperatures above the manufacturer’s minimum.
Mix the sealer thoroughly, then apply thin, even coats instead of one heavy layer. Pay close attention to high-traffic lanes, entrances, and drainage paths where water and de-icing chemicals concentrate.
When you sealcoat promptly in fall, you reduce freeze–thaw penetration, slow oxidation, and help your pavement shed snow and ice evenly.
Repair Potholes Early to Prevent Winter Blowouts
You can prevent costly winter blowouts by spotting early pothole damage and addressing it before freezes hit.
When you repair, use cold patch correctly by cleaning the hole, compacting in thin layers, and leveling the surface.
Finish by sealing the edges so water can’t sneak in and break your repair apart.
Identify Early Pothole Damage
When small cracks and shallow depressions first appear in your asphalt, they’re early warnings that potholes are starting to form.
Train your eye to notice raveling edges, loose gravel, and spots that stay wet or icy longer than surrounding pavement. These subtle changes signal water is entering the surface and weakening the base.
Effective pothole identification starts with regular walk‑throughs of drive lanes, entrances, and high‑traffic corners after storms and freeze‑thaw cycles. During each pass, perform a quick damage assessment: note size, depth, and location of every defect, and photograph trouble areas.
Prioritize areas where tires track or where plows scrape. Addressing these minor issues now prevents larger cavities, hazardous driving conditions, and costly emergency repairs later, especially under repeated freezing and thawing stress.
Use Cold Patch Properly
After spotting early pothole damage, act quickly with a cold patch repair before winter traffic and freeze–thaw cycles turn small defects into blowouts.
First, clean the hole thoroughly; remove loose chunks, dirt, ice, and water so the patch can bond. Then square up ragged sides with a chisel or saw to create a stable boundary.
Pour cold mix in thin lifts, compacting each layer firmly with a hand tamper or plate compactor until it crowns slightly above the surrounding pavement. Proper cold patching techniques focus on density, not just filling the void.
As part of your winter repair strategies, monitor patched spots after storms and re‑compact any areas that loosen under traffic. Prompt attention now reduces costly structural failures and emergency closures later considerably.
Seal Edges To Last
Even a well‑compacted cold patch fails early if water seeps down the sides, so focus on sealing the repair’s edges as tightly as the fill itself.
After you place and compact the mix, brush loose grit away from the joint, then apply a liquid asphalt sealer or crack sealant along the entire perimeter.
This edge sealing blocks meltwater and de‑icing chemicals from working underneath the patch during winter preparation.
Feather the sealer slightly up onto the surrounding pavement so it forms a shallow, continuous band.
Don’t leave gaps or pinholes; they’ll concentrate stress and start new cracks.
Inspect the sealed edges after a few days of traffic and touch up any breaks before temperatures drop.
That small step dramatically extends your winter patch performance.
Improve Drainage to Stop Winter Water Damage
Although cold temperatures and deicing products get most of the blame for winter pavement damage, poor drainage is often the real culprit. When meltwater can’t escape, it seeps into tiny surface flaws, freezes, and pries your asphalt apart. You limit this damage by guiding water away before it can linger.
Start by walking your lot after a thaw or rain. Look for standing water, damp streaks that never dry, and stained low spots; these reveal where you need better drainage solutions. Clear clogged catch basins, outlets, and swales, and keep snow piles away from obvious depressions so water collection doesn’t concentrate there.
Check that your pavement slopes at least one to two percent toward drains or landscaped areas. If it doesn’t, talk with a paving professional about milling high spots, adding small trenches, or installing additional inlets.
Fixing grade problems now helps your asphalt survive repeated freeze–thaw cycles.
Choose Asphalt-Safe Winter De-Icing Products
Good drainage protects your asphalt from trapped meltwater, but what you spread on the ice matters just as much. Traditional rock salt can weaken asphalt binders, dry out the surface, and push dissolved salts into nearby soil and plants.
Instead, read labels and look for products marked safe for asphalt or blacktop. Calcium magnesium acetate and potassium-based blends cost more than salt, but they’re gentler on pavement and nearby landscaping.
Choose de‑icers labeled safe for asphalt; calcium magnesium acetate and potassium blends protect pavement and nearby plants.
When you compare eco friendly options, don’t just check the marketing claims. Review the active ingredients, the recommended temperatures, and any warnings about surface damage.
Product effectiveness drops sharply when you use a de‑icer below its rated low temperature, so you may overapply and raise costs without improving safety. Store bags in a dry place, follow spread‑rate directions, and sweep up leftover pellets once surfaces dry to reduce tracking and unnecessary chemical buildup around your home and driveway.
Plow and Shovel Without Gouging Your Asphalt
When you plow or shovel, the wrong tools and techniques can gouge your asphalt and shorten its life.
You’ll need to choose asphalt-safe tools, like rubber-edged blades and plastic shovels, and use proper plowing techniques that reduce direct metal contact.
With a few simple adjustments, you can clear snow efficiently while preventing costly surface damage.
Choose Asphalt-Safe Tools
One of the fastest ways to ruin a good asphalt surface in winter is using the wrong tools to clear snow and ice. Choose asphalt tools and maintenance equipment that scrape snow, not your pavement. Favor plastic or rubber edges, and avoid sharp metal blades that bite into the surface.
| Tool type | Asphalt-safe feature | Risk level |
| Plastic shovels | Flexible edges | Low |
| Shovels with rubber guards | Cushions contact | Low |
| Steel shovels with sharp lips | Cuts into asphalt | High |
| Plow with polyurethane edge | Glides over surface | Low |
Inspect tool edges regularly; damage-free gear preserves asphalt and prevents expensive winter repair bills.
Proper Plowing Techniques
Although sturdy equipment matters, how you plow or shovel has just as much impact on your asphalt’s lifespan. Use plowing techniques that keep metal edges from digging in. Keep the blade raised slightly above the surface so it rides on skids or shoes, not the pavement itself. Angle the blade and push snow in smooth passes, rather than jamming straight forward.
When snow accumulation is light, switch to a shovel or snow blower instead of a truck or heavy plow. Clear snow in layers during big storms, removing a few inches at a time so you don’t have to apply excess downward pressure.
Work with the slope of your driveway, pushing snow downhill and outward to avoid unnecessary strain on your asphalt and equipment.
Preventing Surface Damage
Even with careful plowing technique, your asphalt can still suffer if metal edges, sharp tools, or bad habits scrape directly against the surface. You protect surface integrity by keeping blades slightly raised, using rubber or polyurethane cutting edges, and shoveling with plastic, not steel. Mark high spots, drains, and curbs so equipment operators don’t dig in. When ice bonds tight, spread sand or de-icer instead of chipping. These habits limit micro-cracking, prevent premature raveling, and greatly improve asphalt longevity.
| Practice | Why it Helps | Quick Tip |
| Raised blade | Avoids gouges | Keep 0.5″ off surface |
| Plastic shovels | Gentler contact | Replace cracked edges |
| Mark obstacles | Protects high points | Use tall reflective stakes |
Document damage after storms and schedule timely repairs before small scrapes expand into structural failures.
Give High-Traffic Asphalt Extra Winter Protection
When asphalt carries heavy traffic all day, it faces far more stress in winter and needs stronger protection to survive freeze-thaw cycles, de-icing chemicals, and constant load-bearing.
In high traffic areas like entrances, drive lanes, and loading zones, you should prioritize extra defense before temperatures plunge. Start with a high-quality sealcoat rated for winter performance; it creates a barrier that slows water penetration and chemical damage, directly improving asphalt longevity.
Next, check that these sections have strong edges and adequate thickness, since overloaded borders crumble first under snowplow pressure. Reinforce weak sections with patching or overlays before storms, not after.
Use de-icers that are less corrosive to asphalt and apply only what you need, focusing on traction rather than bare pavement.
Finally, plan snowplow routes that reduce tight turns and scraping over the same spots, so heavy equipment doesn’t grind away your most vulnerable surfaces during each storm.
Monitor Mid-Winter Asphalt for Early Failure Signs
As winter wears on, you need to watch your asphalt closely for early warning signs of failure.
Regularly walk the pavement to spot new surface cracking, identify areas where water’s pooling, and note any spots where potholes are starting to form.
When you track these issues mid-season, you can address them quickly and prevent small problems from turning into major repairs.
Spot Early Surface Cracking
A cold mid-winter walk across your lot can reveal the first warning signs of asphalt failure: hairline cracks, small surface splits, and faint spiderweb patterns that weren’t there in the fall.
These flaws may look harmless, but they signal that your pavement’s binder is drying, shrinking, and losing flexibility.
Prioritize early detection by building simple surface monitoring into your routine. Walk the same routes every few weeks and compare what you see. Note new cracks, their length, and whether they’re straight, jagged, or branching.
Pay attention to edges around curbs, entrances, and high-traffic lanes; they usually fail first.
When you notice fresh cracking, don’t wait. Document locations, take photos, and schedule prompt sealing before winter damage multiplies.
Early repairs now prevent major replacement costs.
Identify Drainage Problem Areas
Beyond cracks, the fastest way winter destroys asphalt is through poor drainage that lets water sit, seep, and refreeze. You need to spot these trouble zones while snow and slush are still on the ground.
Look for:
- Visible water pooling that lingers hours after a thaw or light rain, especially near low spots, joints, and around drains.
- Ice sheets that repeatedly form in the same areas, signaling trapped moisture and inadequate slope.
- Clogged inlets, grates, or swales where debris blocks flow and forces meltwater back onto the pavement.
- Edges where runoff escapes the pavement and erodes shoulders, undercutting the asphalt.
Document locations and severity so you can target permanent drainage solutions once temperatures rise. That planning keeps your pavement stronger.
Track Pothole Development
While cold, wet weather churns on, your pavement quietly reveals where it’s likely to fail next—through small pothole “starts” you can spot and track.
Walk your lots weekly as part of winter maintenance, especially after storms and freeze–thaw cycles. Look for shallow depressions, unraveling edges, and fine cracks that collect water or stay damp longer than surrounding areas.
Mark these locations on a simple site map or app, and photograph them so you can compare changes over time. If a spot deepens, widens, or exposes base material, schedule a cold patch or infrared repair before it breaks open.
This kind of proactive monitoring turns pothole development into pothole prevention, saving you from emergency repairs, liability claims, and unhappy tenants. Document dates to refine planning.
Plan Post-Winter Asphalt Repairs and Maintenance Programs
Even before the last patches of snow melt, you should start planning post-winter asphalt repairs and a proactive maintenance program. Early planning lets you line up contractors, budget accurately, and protect your pavement before minor defects spread.
Plan post-winter asphalt repairs early to secure contractors, control costs, and stop small pavement issues from spreading
Begin by reviewing your winter inspection notes and photographs. Prioritize areas where moisture and traffic combined to worsen cracks, potholes, or rutting.
Then design asphalt longevity strategies that extend the life of every repair you fund:
- Create a seasonal maintenance schedule that pairs spring crack sealing with late-summer sealcoating.
- Group repairs by location to reduce mobilization costs and disruption.
- Match treatments to distress: patch deep failures, overlay oxidized surfaces, and seal tight, linear cracks.
- Schedule post-repair inspections to verify workmanship and adjust future budgets.
When you treat winter damage as data for next year’s plan, your pavement program becomes predictable, defensible, and cost-effective for you and stakeholders.
Frequently Asked Questions
How Much Should I Budget Annually for Comprehensive Winter Asphalt Maintenance?
You should budget roughly $0.20–$0.50 per square foot annually for thorough winter asphalt care, covering sealcoating, crack sealing, de-icing, and patching, so your annual budget reliably matches expected maintenance costs and prevents surprise repairs later.
Can Winter Asphalt Maintenance Lower My Business Insurance Premiums or Liability Risks?
Yes, asphalt maintenance can lower premiums and liability risks because you’re preventing accidents. Insurers may reward safer surfaces with insurance savings, while documented inspections, repairs, and snow-removal practices support liability reduction in slip-and-fall claims later.
What Winter Asphalt Maintenance Records Should I Keep for Warranties and Legal Protection?
You should keep detailed maintenance logs, contractor invoices, inspection reports, photos before and after work, weather conditions, repair dates, material specifications, and written warranty documentation, so you can prove care, support claims, and protect legally.
Are There Eco-Friendly Winter Asphalt Maintenance Options That Still Perform Well in Extreme Cold?
You’ll choose eco-friendly options that still work in extreme cold when you use bio-based deicers, permeable pavements, sustainable sealants, and mixes with cold weather additives, while also optimizing plowing techniques and runoff and drainage management.
How Do I Prioritize Winter Asphalt Work When Managing Multiple Parking Lots or Sites?
You prioritize winter asphalt work by ranking lots by traffic volume, safety risk, and damage severity, then scheduling crews accordingly, using asphalt prioritization strategies and digital tools for managing multiple sites efficiently during weather windows.
Final Thoughts
When you stay proactive with winter asphalt maintenance, you protect far more than the surface—you safeguard your pavement structure, your budget, and everyone who uses your property. Inspecting early, cleaning thoroughly, sealing cracks, and repairing potholes before freezes hit all help stop minor flaws from turning into major failures. Pairing those steps with smart drainage and careful snow removal gives both residential driveways and busy parking lots a much better chance of surviving harsh freeze–thaw cycles without costly surprises. For many properties, building a winter plan around services like asphalt sealcoating and timely asphalt resurfacing is the difference between simple spring touch-ups and full-scale reconstruction.
Whether you’re responsible for a home driveway or multiple commercial lots, it helps to have an experienced paving partner on your side. Parkway Paving LLC can walk your site before winter, prioritize crack sealing and spot repairs, and recommend the right mix of residential asphalt paving, commercial asphalt paving, and parking lot paving strategies to keep your surfaces safer and longer-lasting season after season.
If you’re ready to put a winter asphalt maintenance plan in place—or need help recovering from last winter’s damage—reach out to Parkway Paving LLC today. Learn more about their team on the About Us page, then call or text (862) 596-0642 or request an estimate through the contact page. By acting now, you can go into winter with a clear plan, protect your investment, and make sure your asphalt holds up strong when temperatures drop.